Filtering Investigations
Filtering investigations enables you to narrow down and focus large amounts of event data so that you can identify specific activities, entities, or patterns. By filtering investigation results to events that match specific criteria, you can identify and analyze the information needed to understand security events and potential threats.
Filtering by time range
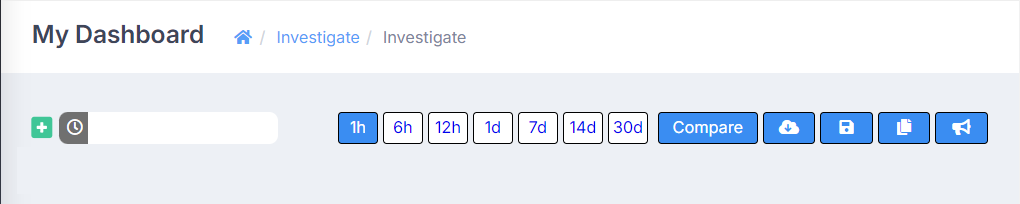
The first step in filtering an investigation is often modifying the time range. For example, if you were interested in seeing only events that occurred near the time a specific event occurred, you could define a narrow time range around that specific event. If your investigation is returning thousands of events, you will likely want to narrow the time range until a manageable number of events are returned.
You can quickly change the time range of the investigation by clicking one of the buttons displaying an hour or day range. When you do so, the time range filtering criteria (the filter with the  icon) will be updated to the new time range.
You can also define a specific time range by directly modifying the time range filtering criteria. To do so, hover over the filtering criteria with the icon, then click  , then modify the time range as needed, and then click Add Filter.
Adding and editing filters
There are two ways to add filters to an investigation.
The first way is to use the filtering controls in the upper-left corner of the page. To add an additional filter, click  , then enter the specifications for the filter, and then click Add Filter. Note that you can also edit an existing filter by hovering over the filter, and then clicking the button that appears. You can delete a filter by hovering over the filter, and then clicking the
  button.
The second way to add a filter uses the controls in the Field Summary section of the investigation page.

Consider a scenario where you want to view only the events related to the Office 365 product. To achieve this, you could add a filter using the Field Summary section. When you hover over any entry in this section, plus and minus buttons appear beside the entry.
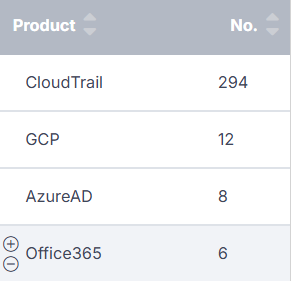
In the row for Office 365, if you click the plus button, a new filter will be added, and the results on the investigation page will be updated to display only information about the events related to Office 365. Note that, if you selected the minus button, the results would be updated to display only information about events not related to Office 365. To return the information displayed to its original state, simply delete the filter you added.
Using the Field Summary section controls is a convenient way to add filters, but what if the value by which you want to filter is not present in the section? ActiveEye provides a method for adding and removing information from the Field Summary section, as well as an additional method for adding filters, using controls in the Table subsection of each event.
Events listing
Below the Field Summary section, the table of events appears.
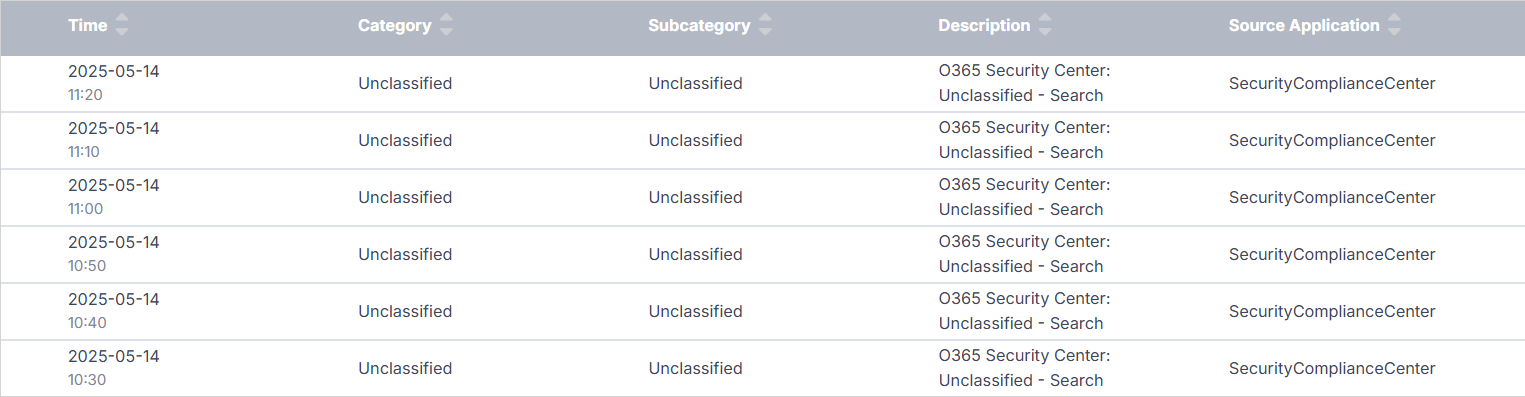
Click the row for any event to expand it, and then click Table to access the Table subsection.
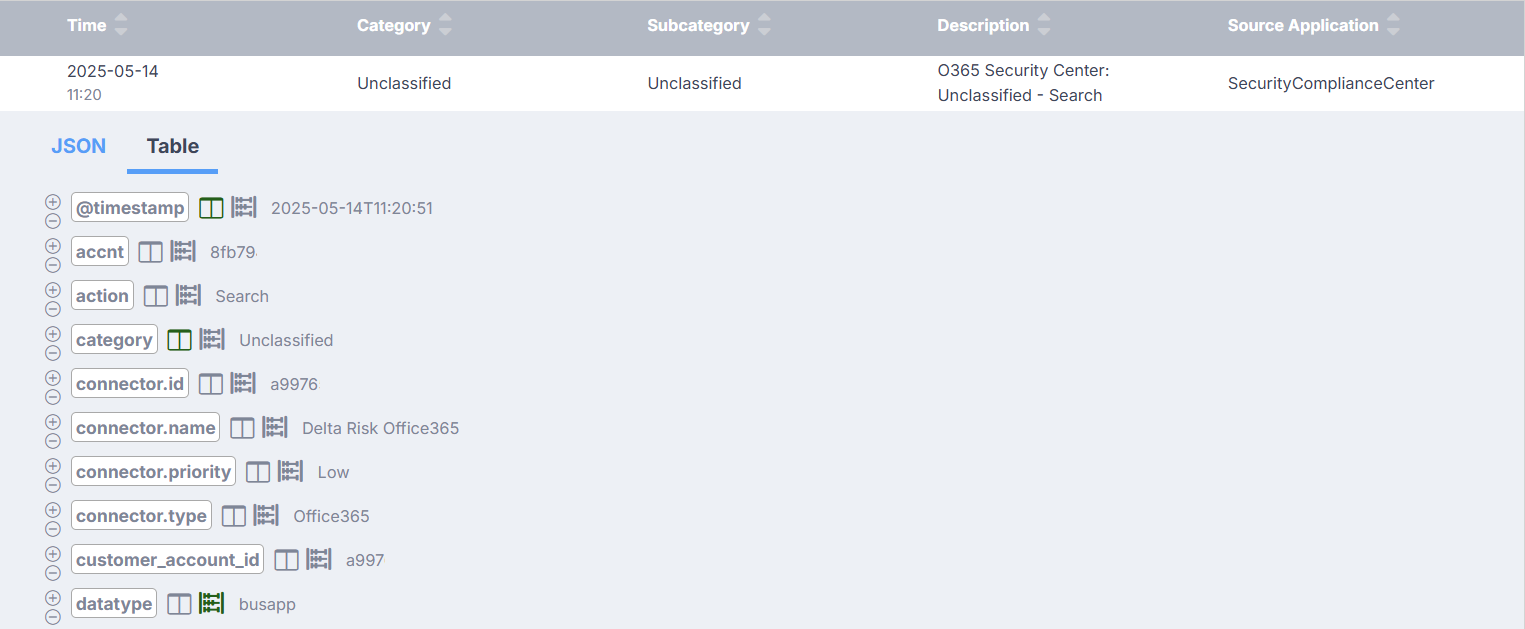
This subsection contains a number of controls to help you refine investigation results.
- As before, you can select the plus or minus button beside any field value to add it as an inclusive or exclusive filtering criteria.
- You can select the
 button beside any field value to toggle its inclusion as a column in the table of events. This can make it easier to find relevant information when scrolling through results. If the button is green (
 ), the value will be included as a column. If the button is gray (), the value will not be included.
 - You can select the
 button beside any field value to toggle its inclusion as a subsection within the Field Summary section. This is an excellent way to display summary information for comparison. If the button is green (
 ), the subsection will be included. If the button is gray (), the subsection will not be included.
Examples of fields
Here are some examples of fields commonly used as filtering criteria or included in the Field Summary section, and explanations of their purposes.
- dst_name (Destination Name): Filter on this field to limit events returned to only those involving a particular destination. This can give you an overview of the types of traffic that destination receives.
- srcApp (Source Application): You could filter on this field to see all events associated with a specific service, to better understand the overall activity of the service.
- source_ip.geo.country_code: Filter on this field to view events originating from a specific country, allowing you to focus on potentially malicious activity from particular geographic locations.
- duser (Destination User): Filter on this field to view events related to a specific user, to see what other actions the user took near the time of an action you are investigating. This can be useful in determining what the user was trying to accomplish.
- subcategory (or actionType): These fields usually report the success or failure of an event, informing you of the results of intended actions.
- action (and desc): The action and description fields will help inform you of what triggered the alert. These values can be different, but tend to be similar messages written with different verbiage. You should use both fields for a more complete view.