Microsoft Azure Infrastructure
Client Information
Before logs can be pulled from your Microsoft Azure account, some information will need to be gathered. Some of these items may require additional setup within your Microsoft account and are documented in the subsequent sections.
In order to enable log retrieval, the following information will need to be collected:
- Directory ID - Sometimes referred to as the tenant or account id. This is a UUID string 36 characters in length
- Application ID - This is a UUID string 36 characters in length
- Secret Key - A random string approximately 44 characters in length
Additionally, permissions will be required to be set to provide access to the log resources. These permissions are detailed below.
Configuring the Application Credentials
The first step will be to gather the information noted above and to setup an application registration for use.
Get the Directory ID
To get the Directory ID perform the following steps
- Login to the Microsoft Azure Portal with an administrator account.
- Select "Azure Active Directory" from "Favorites" on the left or "All services"
- Choose "Properties" under "Manage"
- Copy the "Directory ID" using the copy button to the right of the Directory ID
- Record this value and denote it as the "Directory ID"
Create an Application Registration
A new app registration must be created in the Azure Portal from which the Application ID and Secret Key will be copied.
- In the Microsoft Azure Portal select “Azure Active Directory”
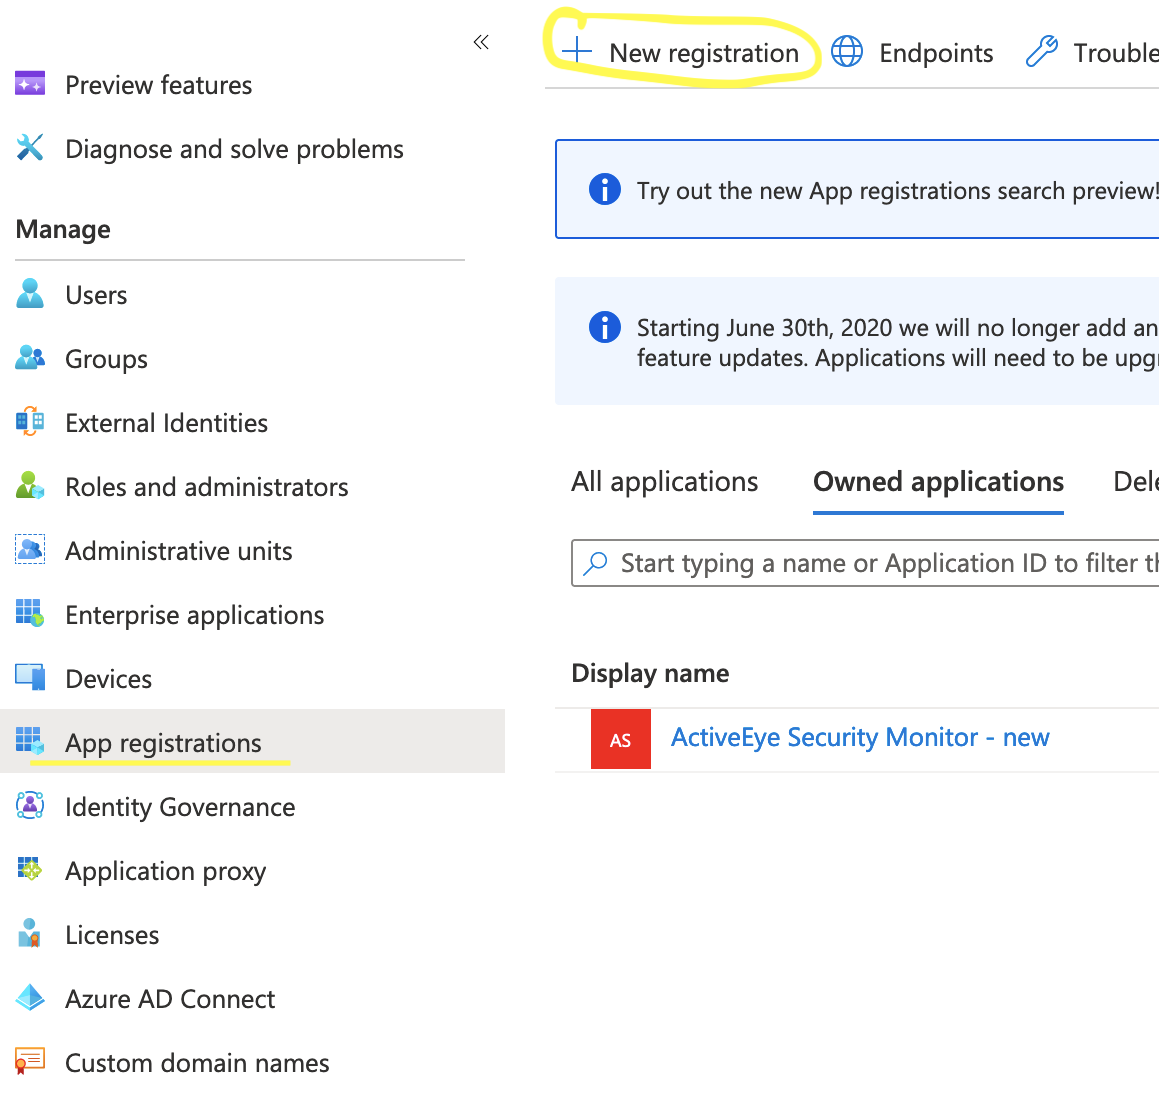
- Then select “App Registrations” under "Manage”
- Click the “New registration” button at the top
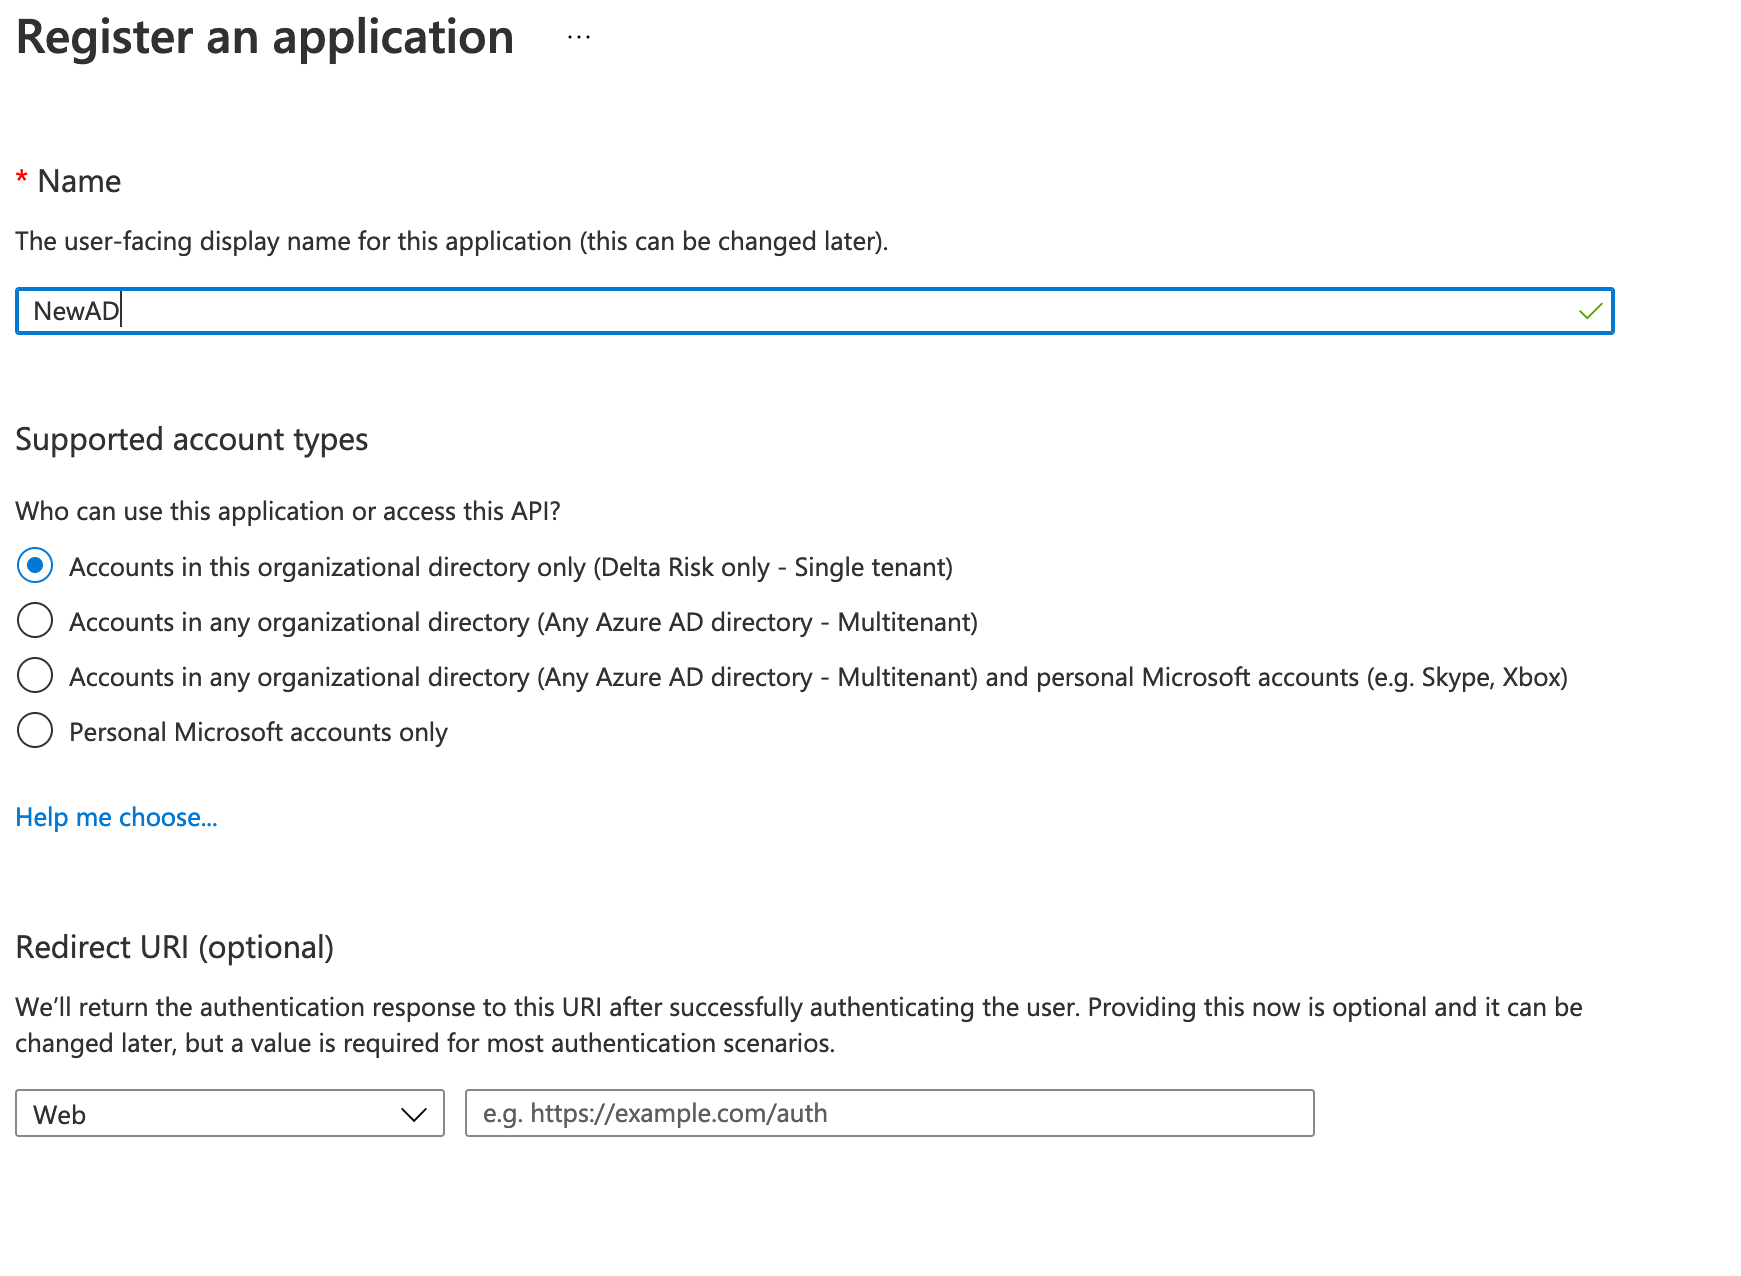
- Enter in the Name “ActiveEye Security Monitor”
- Under "Supported account types", select "Accounts in this organizational directory only (<Your Organization Here>)"
- Leave "Redirect URI (optional)" unmodified
- At the bottom, click "Register"
- Copy the "Application ID" and "Secret Key"
Get the Application and Directory ID
You will be redirected to the registered application page for your new application registration. From here:

- Hover over "Application (client) ID" and the copy button will appear to the right. Click this button.
- Record this value as the "Application ID".
- Hover over "Directory (tenant) ID" and the copy button will appear to the right. Click this button.
- Record this value as the "Directory ID"
The value needed on this page is the Application ID, not the Object ID.
Alternative to get the Directory ID (if absent in the above step)
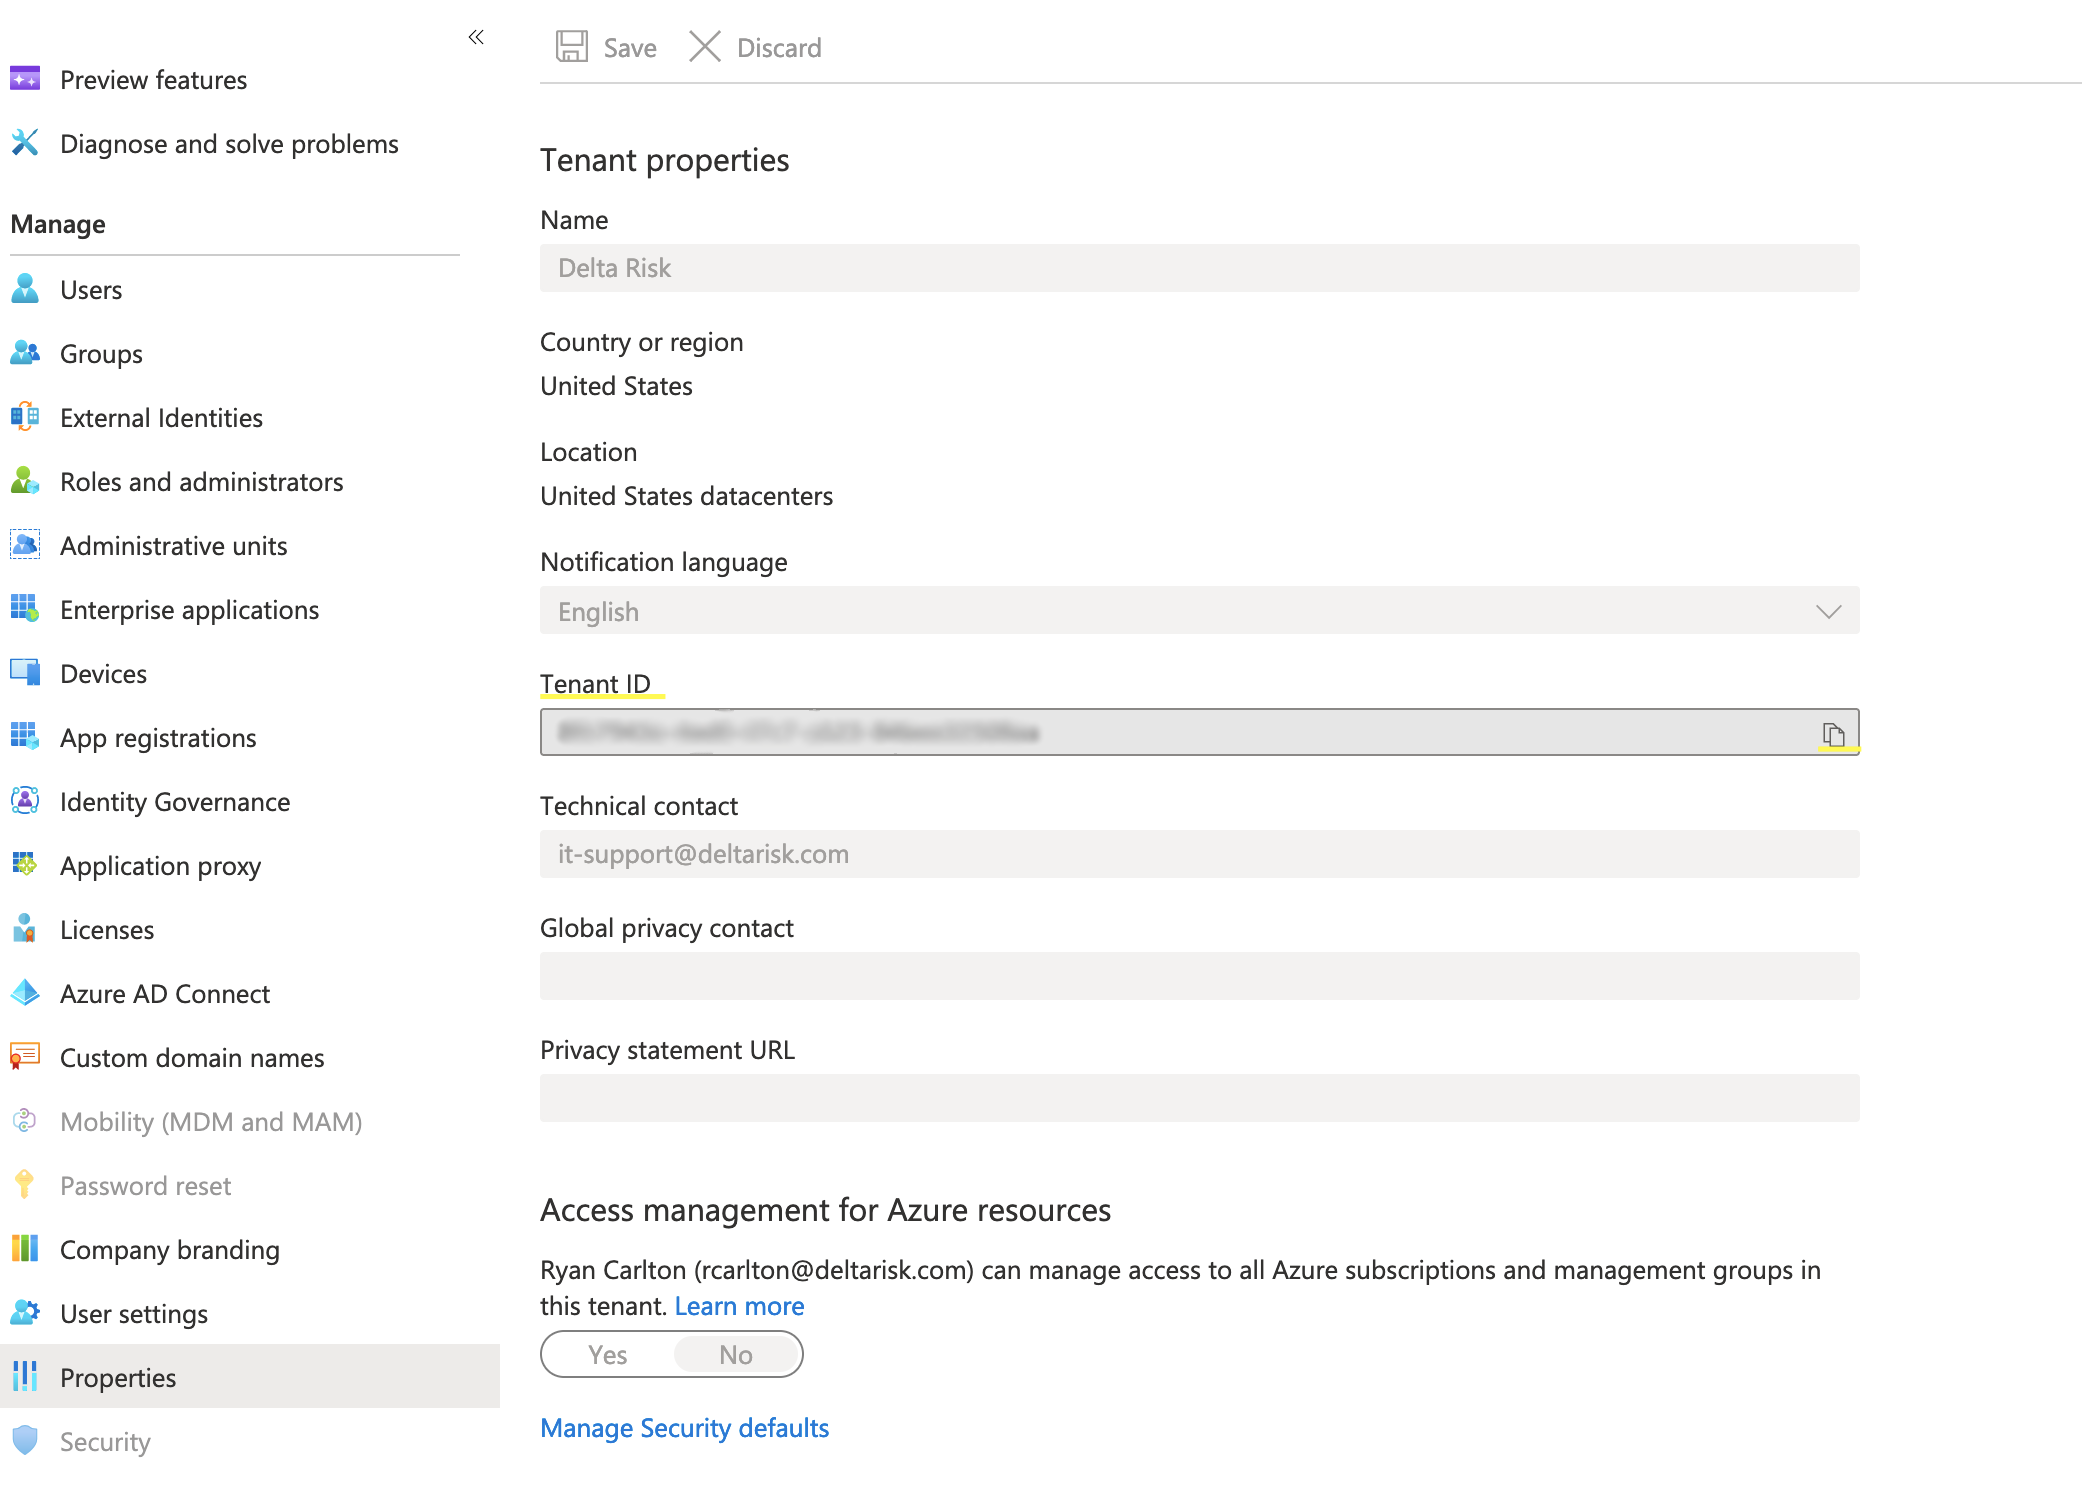
To get the Directory ID perform the following steps
- Login to the Microsoft Azure Portal with an administrator account.
- Select "Azure Active Directory" from "Favorites" on the left or "All services"
- Choose "Properties" under "Manage"
- Copy the "Tenant ID" using the copy button to the right of the Tenant ID
- Record this value and denote it as the "Directory ID"
Get the Secret Key
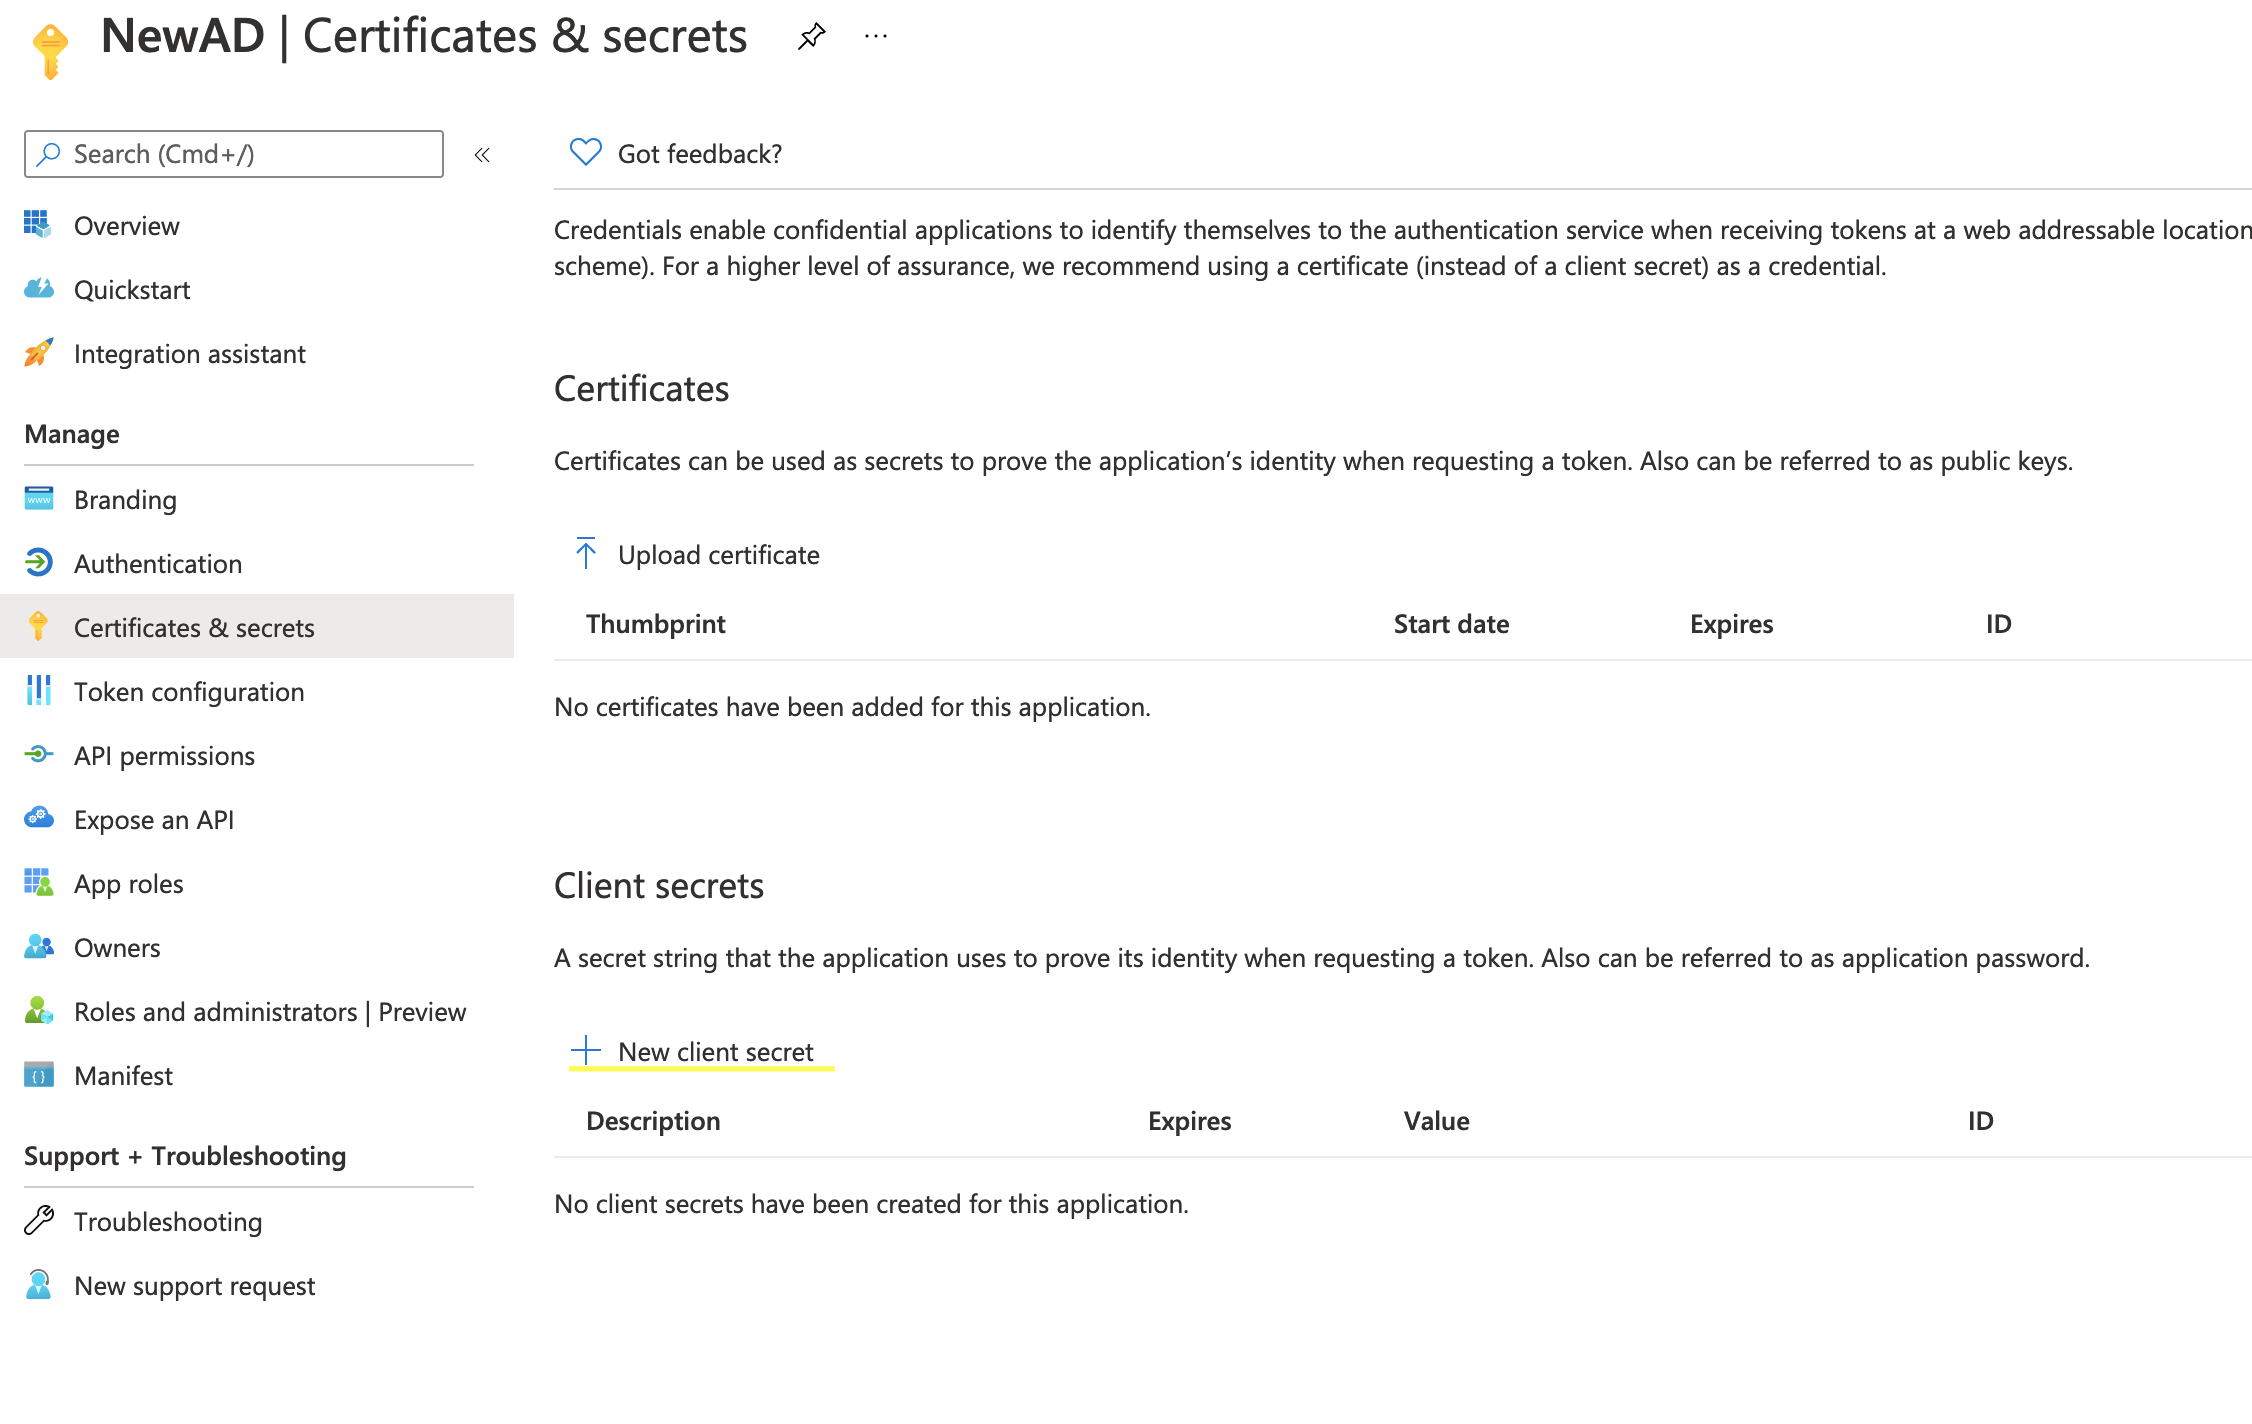
- From the registered application page where you obtained the Application ID, click "Certificates and secrets" from the left-side menu.
- Under "Client secrets", click "New client secret".
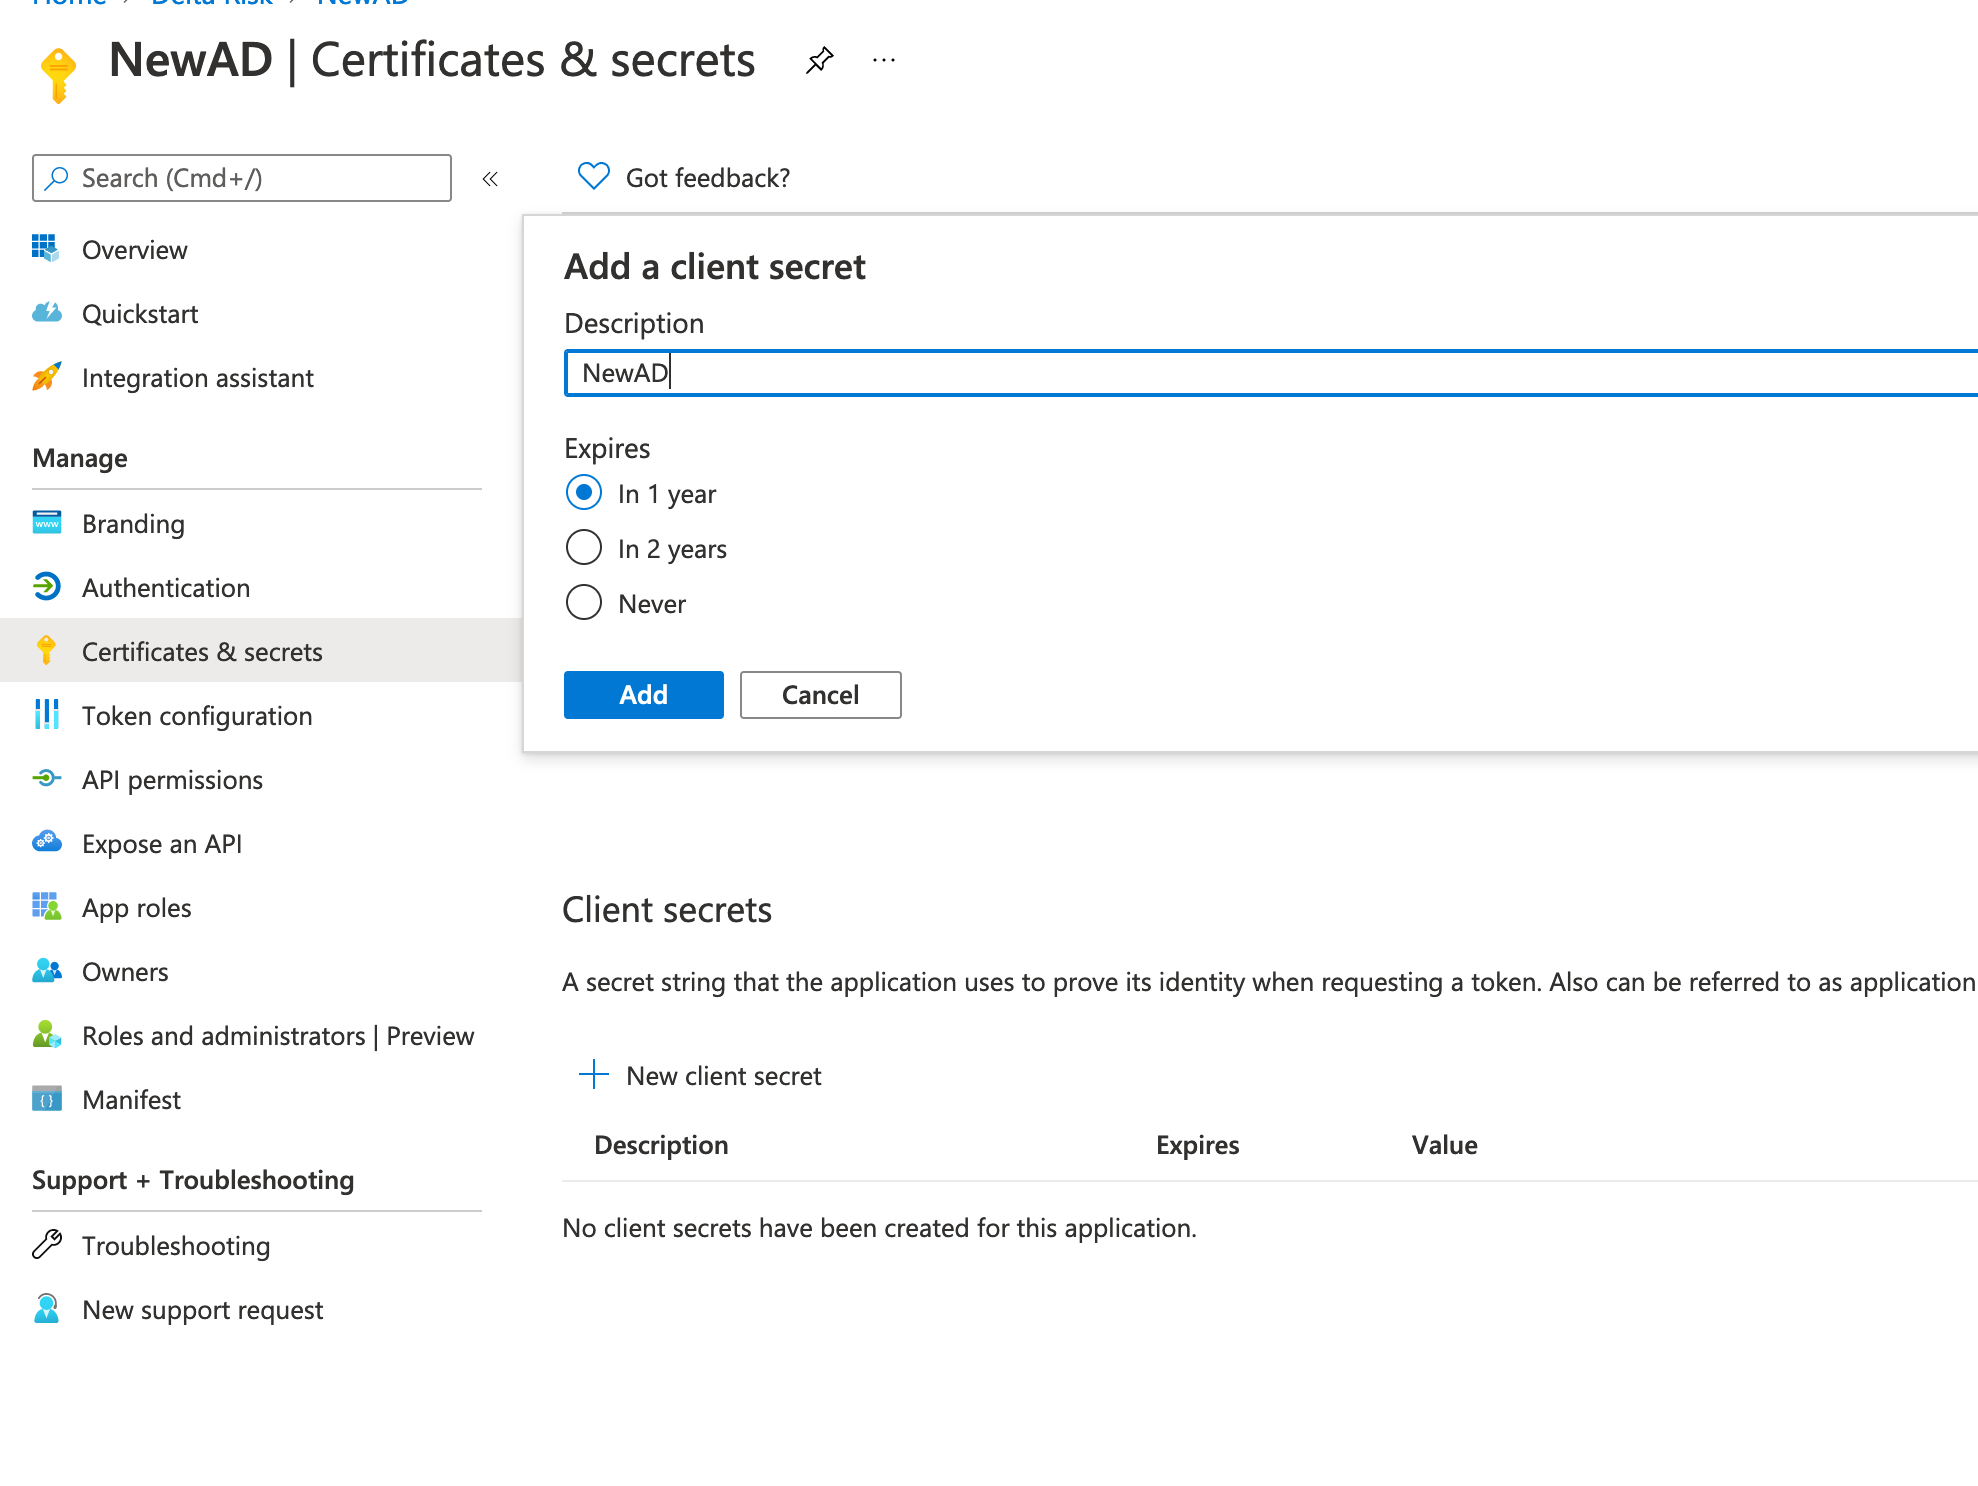
- For "Description", enter "ActiveEye Security Monitor".
- Select "Never", then click "Add".
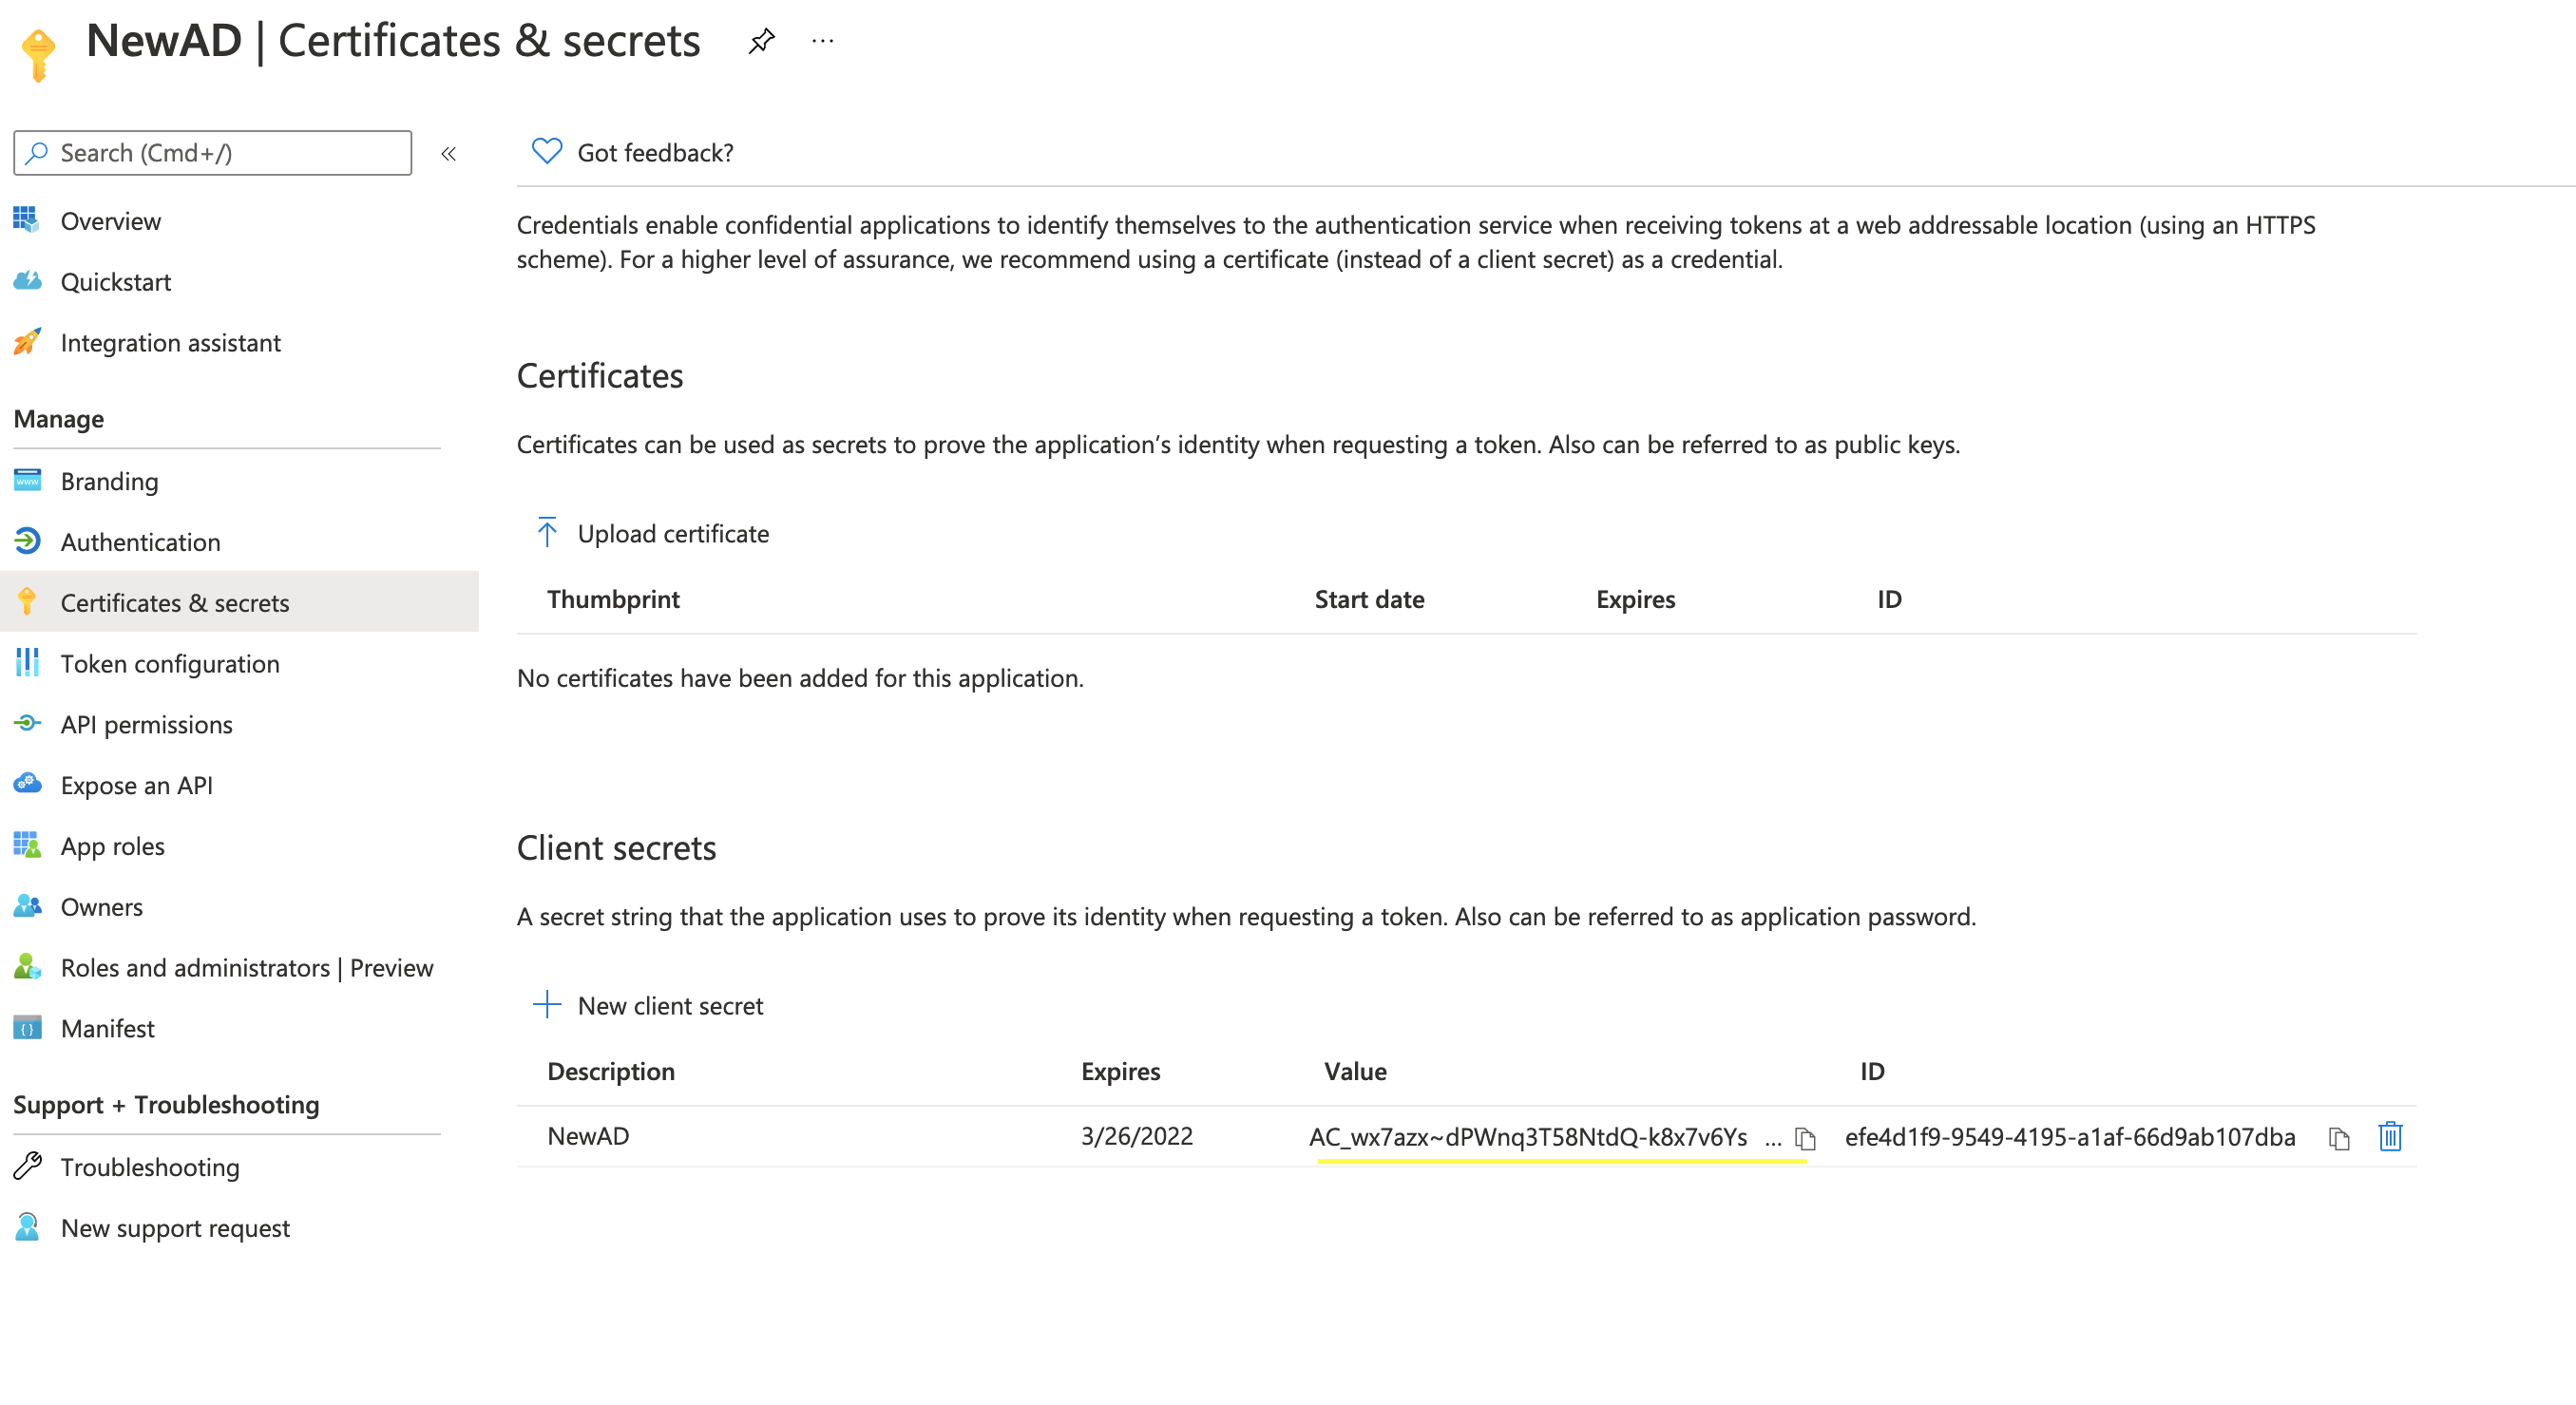
- When the screen refreshes, there will be a new entry under "Client secrets". Under "Value", there will be a copy button. Click this button.
- Record this value as the "Secret Key".
This is the only time this key will be available. If capturing this key was missed in the process then delete the original and create a new key.
Grant Permissions
You must be a "Global Administrator" to perform this action. If you are not, you can ask an administrator do to so.
Anytime you make changes to app permissions an administrator must take the additional step to grant those permissions by performing the following steps. This step is critical and if not done event log collection will not function properly.
- On the next screen, click the "Grant Permissions" button
- Click "Yes" on the confirmation screen
- This will authorize the change to permissions that was made
STOP! MAKE SURE TO COMPLETE THIS STEP
Azure Infrastructure Role Based Access Control
If your organization does not utilize Azure cloud infrastructure you may skip this section.
Microsoft Azure infrastructure as a service logs can be monitored in addition to the services above.
Perform the following steps to enable API access to the registered application.
If there are more than one Azure subscription, repeat the following sections for each. Note each Subscription ID with an easily identifiable name.
Get Subscription ID
- Login to the Microsoft Azure Portal with an administrator account.
- Select "Subscriptions" from "All services"
- There may be multiple subscriptions listed. Select the subscription to monitor.
- In the right hand panel, hover over the "Subscription ID" and the copy button will appear to the right. Click this button
- Alternatively highlight the Subscription ID UUID and copy the value
- Record this value and denote it as the "Subscription ID". Make note of the subscription name as well.
Assign Role Based Access Controls
- While viewing the subscription, select "Access control (IAM)" in the middle panel
- Click the "Add" button above
- In the Role selector choose "Reader". Hint: type the first few letters and the list will auto-filter
- In the Assign Access to selection, keep "Azure AD user, group or application"
- In the Select box, choose the registered app from the previous section (e.g. "ActiveEye Security Monitor"). Type the first few letters to filter the list
- Click the Save button below
Repeat for Additional Subscriptions
If there is more than one Azure subscription to be monitored, repeat the steps above.
Provide Client Information
The Directory ID, Application ID, Secret Key and possibly Subscription IDs and names should now be collected and available to complete the setup and start log collection. Provide these value to your service representative or use them for self service configuration following the "Configuring a new Service Connector for log collection" guide.