AWS Security Configuration
Summary
ActiveEye audit your AWS infrastructure configurations against industry benchmark best practices and make you aware of areas of improvement. This requires a role to be setup in you AWS account for use by ActiveEye. This role will have read permissions on the AWS infrastructure configurations, but not on sensitive data in any way.
Client Information
Before ActiveEye can begin reading security configurations from a customer's Amazon Account we will need specific information from your team with respect to its AWS environment. These items may require additional setup within your Amazon Account and are documented in the subsequent sections.
To enable log and security configuration retrieval from the AWS environment(s), we will need the following information for each AWS account to be monitored:
- Account ID - This will be a number such as a 12-digit number. Clicking the down-arrow next to your username on the top bar once logged in will display this number.
- External ID - A semi-descriptive name of this AWS account. If you have multiple AWS accounts this should be used to distinguish one account from another. Use all lower case and separate words with dashes.
Create Cloudformation Stack
The following steps will need to be performed by an AWS IAM User with permissions to create CloudFormation Stacks, IAM Roles. This is generally someone with AWS administrator rights.
Step by Step Instructions
- Login to the AWS console, click on Services, and under the Management Tools section click CloudFormation.
- Click the "Create Stack" button
- Click the "Specify an Amazon S3 template URL" radio button. Populate the text field with the following url then click "Next".
https://s3.amazonaws.com/delta-risk-cloudformation-templates/activeeye-security-monitor.yaml
- In the "Stack name" field, enter "activeeye-security-monitor"
- In the "ExternalID" field, enter a semi-descriptive name of this AWS account. If you have multiple AWS accounts this should be used to distinguish one account from another. Use all lower case and separate words with dashes. E.g. acme-prod or acme-webapp-test
The External ID is not a secret in any way. It is simply an additional security measure that AWS recommends when allowing third parties to interact with your AWS resources.
For more information on External IDs, see the following blog posting How to Use External ID When Granting Access to Your AWS Resources
- Click "Next"
- On the Options page, scroll below and click "Next"
- On the final page of the wizard, check the box "I acknowledge that AWS CloudFormation might create IAM resources with custom names".
- Click "Create"
- When the stack is finished creating, select the stack and click the Outputs tab.
- Copy the AccountID and ExternalID and save for future use.
Repeat for Additional Accounts
If there are more than one AWS accounts to be monitored, repeat the steps above.
Creating Service Connectors per AWS Account
For each AWS account that will be monitored a corresponding Service Connector will need to be created in ActiveEye. This is done to separate the data into distinctly monitored entities with differing priorities and status.
You must be an ActiveEye administrator to be able to perform the following steps.
Do these steps in ActiveEye:
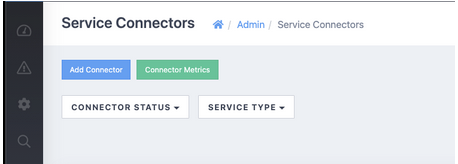
- From the left hand menu, select ADMIN, SERVICE CONNECTORS.

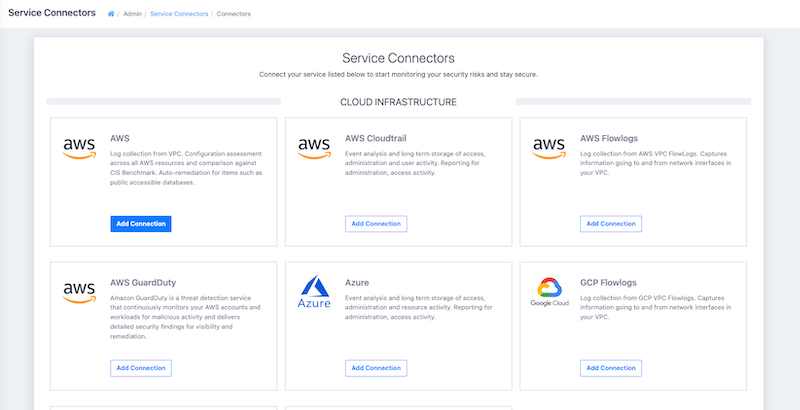
- Click the Add Connector button then Add Connection under AWS.


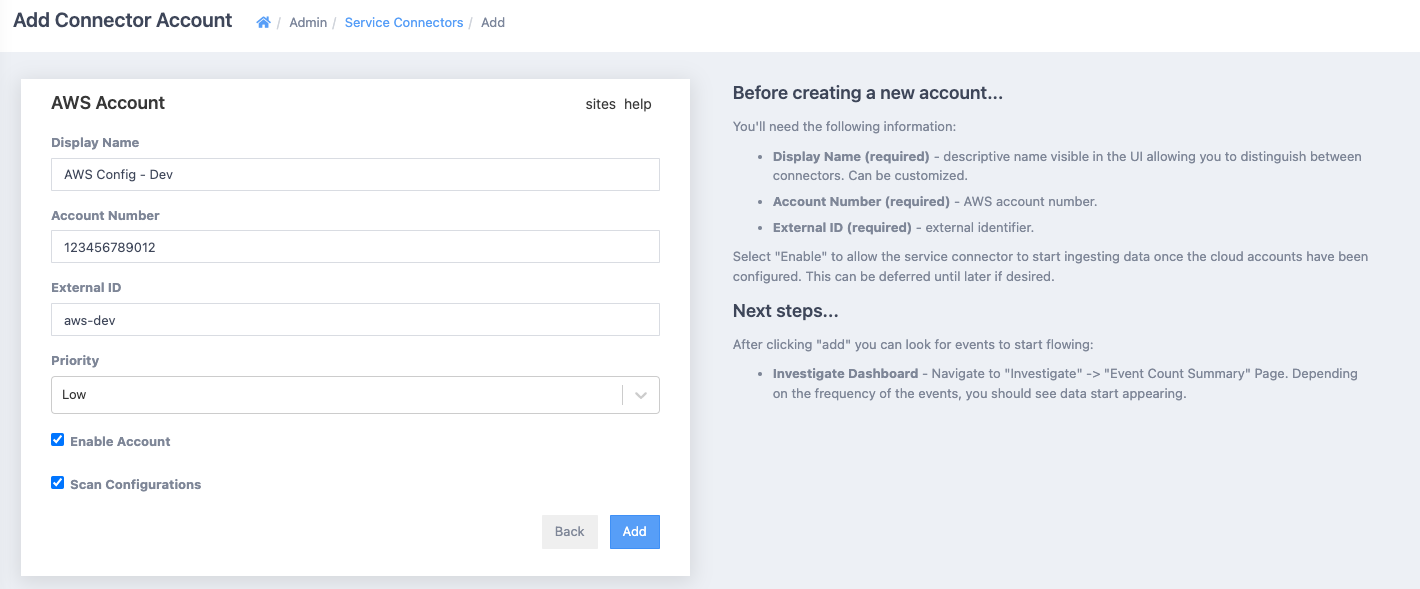
- Fill in the form
In the Display Name input, enter a distinguishable name for the AWS account. This name must be unique within ActiveEye for a particular connector type (in this case unique among AWS connector types). Enter the AWS account id immediately below. This will be a 12 digit number.
In the External ID input, paste the ExternalID set in the activeeye-security-monitor Cloudformation stack. The External ID in the service connector must exactly match the ExternalID parameter that was set in the Cloudformation stack.
Tick the "Scan Configurations" checkbox.
Account priority may be adjusted to raise or lower the priority of the alerts created for this AWS account. Set the priority appropriately (e.g. dev test accounts could be low while accounts with sensitive information could be high). The priority can also be changed later, after the service connector has been created.
Click the Add button to finish setting up the Service Connector.

Repeat if necessary. Create individual service connectors for each AWS account to be monitored.
Provide Account Information
The Account IDs and External IDs should now be collected and available to complete the setup and start log collection. Provide these value to your service representative or use them for self service configuration.